How to give access for managers?
So, you are ready to provide access to information in Yva.ai to your employees. Where should you start?
Step 1. Identify the list of managers and the groups of employees they are responsible for
Determine the results of which group you show to each of the managers. Read an article Why do you have to assign access to information in Yva.ai & how to do it correctly? to learn how to do this.
As a result, you should get a complete list of employees who are connected to Yva.ai and a complete list of their managers and the departments they work in. Below is an example of a table that you should get.

Make sure that the list follows the 4 rules.
Each employee has a Manager assigned to them (except for the first person).
No employee is subordinate to him or herself.
There is no situation when submission is looped. For example, John Doe reports to Lana Lane, and Lana Lane reports to John Doe.
From any employee connected to the Yva.ai platform, you can build a chain of command to the first person of the company. Make sure there are no divisions that are headed by employees who do not report directly or indirectly to the first person of the company.
If one condition at least is not met the distribution of accesses doesn’t work correctly.
Step 2. Configure accesses
If your company has set up and supports AD which contains information about employees and their managers you need to pass the collected information to the IT-Department so that they can adjust the distribution there.
Or you need to check if the information in AD is correct and corresponds to your idea of an access distribution. After adding/adjusting information in AD information about employees and their managers in the AD is displayed in the Yva.ai it is updated automatically.
If you have the platform already installed and all employee information is collected from AD, you need to check the accuracy of this information and either change it in AD or upload new information via a CSV file.
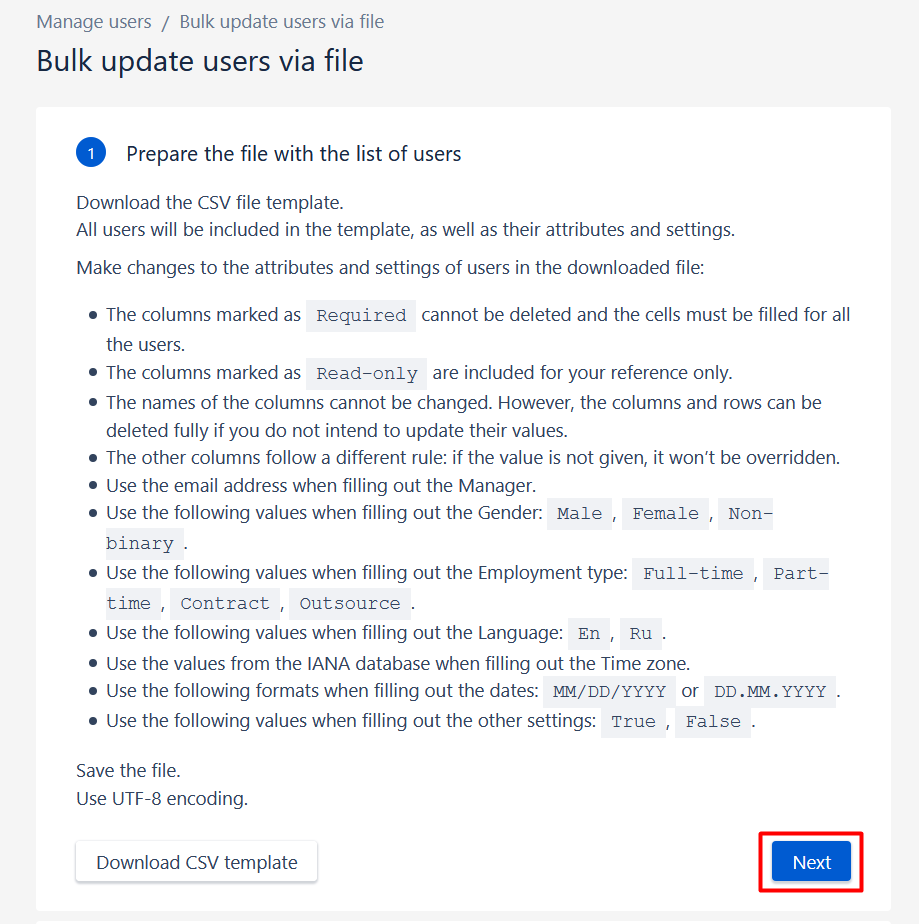
If your company does not have AD configured or the data in it is not suitable for you for some reason, you can enter this information in the Yva.ai via a CSV file. To do this you need to make the following steps.
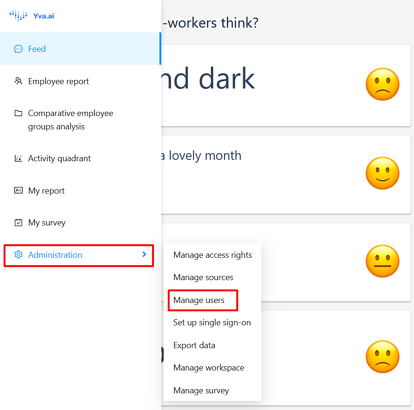
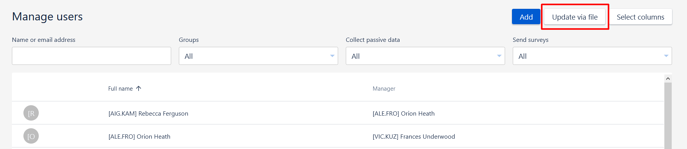
Go to “Administration” > “Manage Users”.
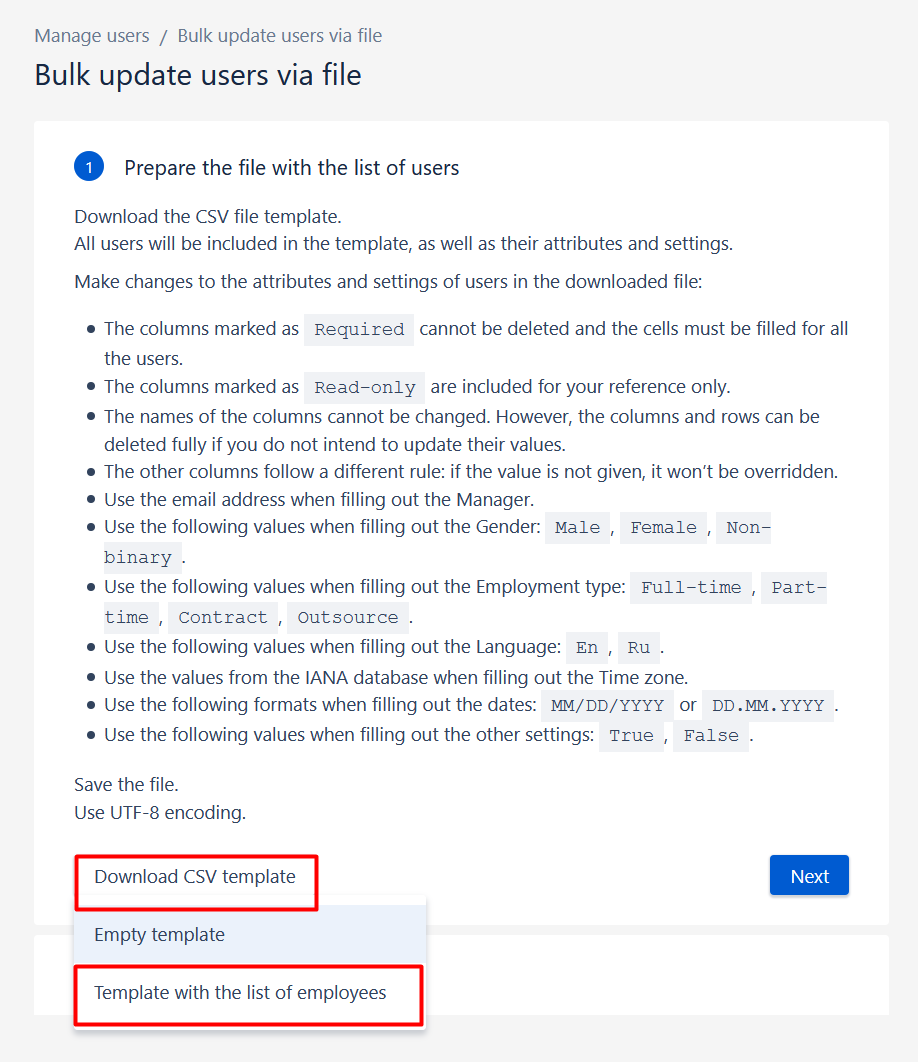
Click the “Update via file” button.
On the page for updating user information via file click “Download CSV template” > “Template with the list of employees”.
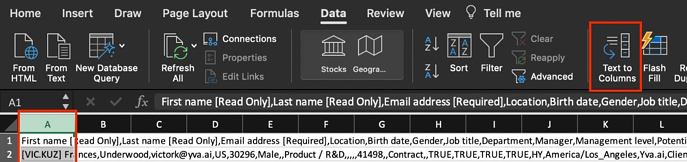
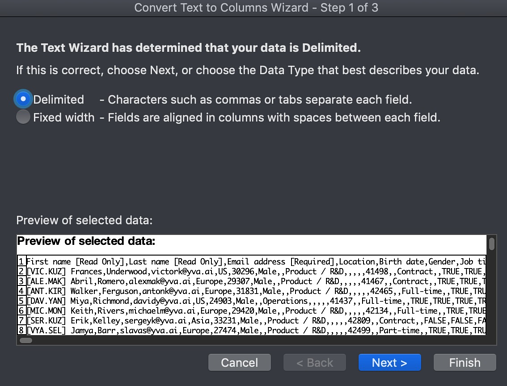
As a result, a CSV file with ememployees'ata connected to the Internet is uploaded. Yva.ai. You need to open it with Excel and split the data into columns. Select the entire first column & click “Data” > “Text by Columns”
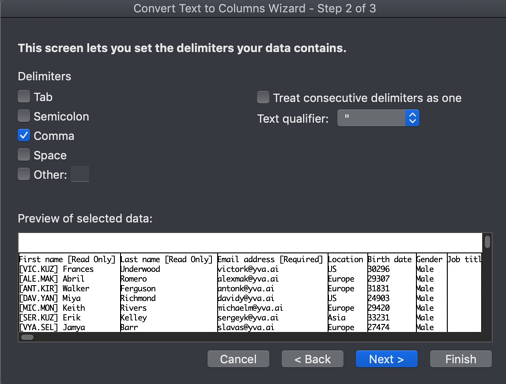
Next, you need to click “Delimited” > “Comma” > “Finish”
After all the transformations you get a table with a list of employees connected to the platform and information about these employees, such as full name, email, etc. In this table in the Manager (column “I”) you need to specify the email address of the Manager of the employee that is specified in the row. The fastest way is to pull up the email of managers to the email of employees from your file using the VLOOKUP function.

After you fill in the table you need to save the file in CSV format with a comma separator. To do this click “File” > “Save as” > Choose a place to save the file, the file name and the desired format” > Click “Save”. We recommend you to save the file to acation that you can easily find.

The last step is to upload our file to the Yva.ai platform. To do this you need to go back to the page where you downloaded the file and click “Next”.
The platform redirects you to the file downloading page. Click “Select CSV file”, select the file that you completed in the window that opens. Upload it to the platform and click “Update”.
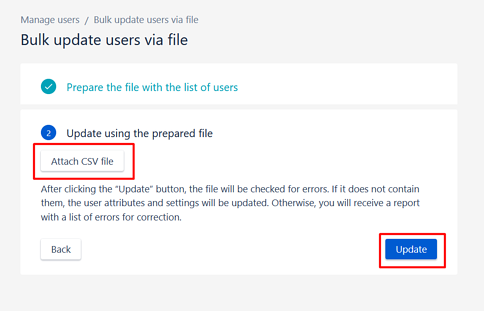
After this Yva.ai platform will grant access to your employees by the information that you have just uploaded.
Step 3. Grant additional access to those who need it
It happens in companies that a person who is not the head of any group of people needs to have access to information about these employees. For example, an employee of the HR department often needs access to everything in the company. He needs to understand what is happening to every group of employees and every person in the company. You can configure such access in the interface Yva.ai.
To do this you need to make the following steps.
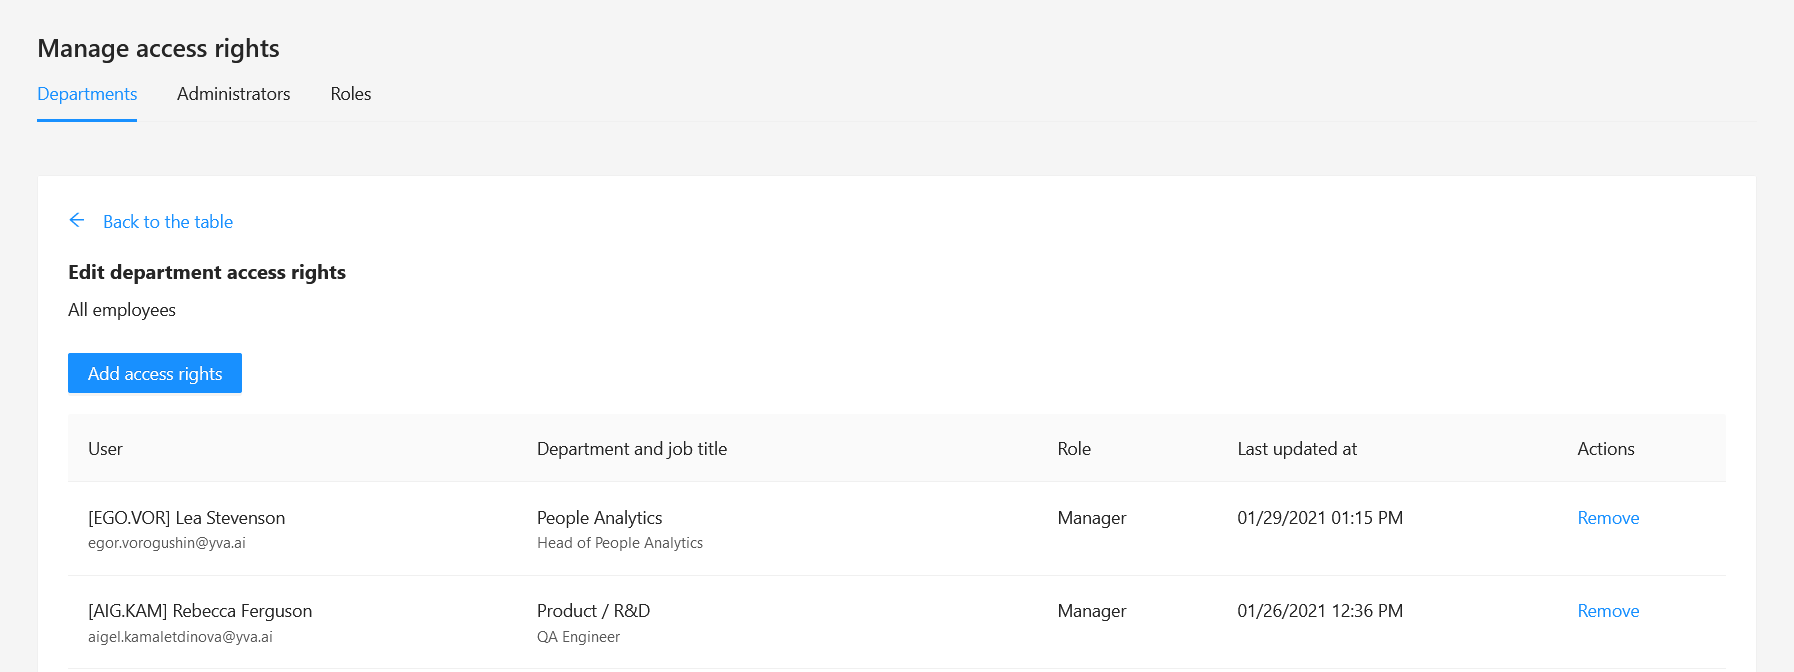
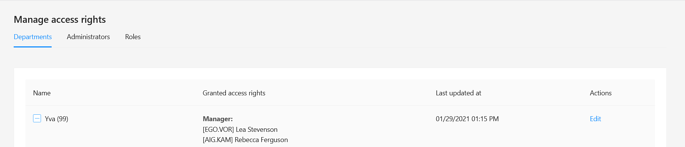
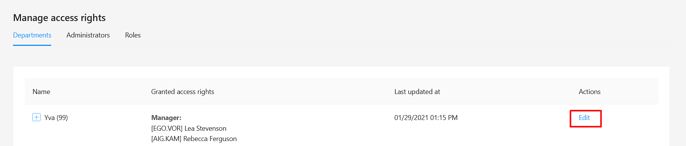
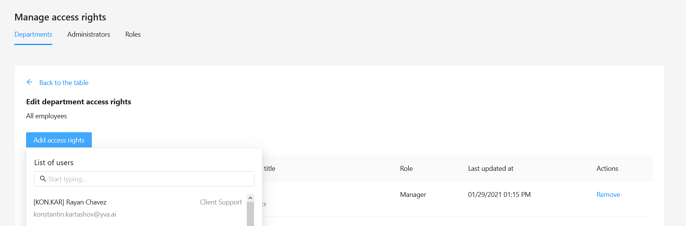
Go to the Yva.ai in the “Administration” > “Manage access rights”

Select the department to which you need to grant access to any employee and click “Edit”.
Click the “Add access rights” button.
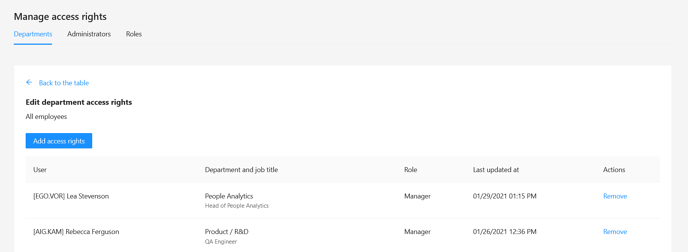
In the list of users, select the employee whom you want to grant access and specify the role “Manager”.
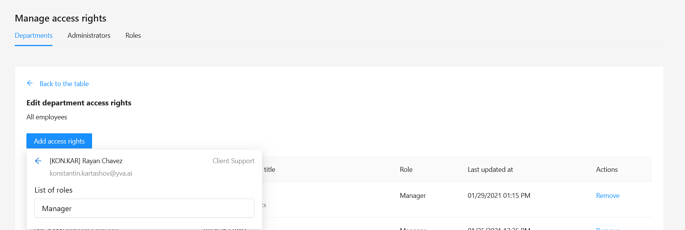
After this employee will appear in the list of managers of this department in the system, and the employees will also have access to information about this department and its employees.