Microsoft Exchange
Make sure that you have administrator access to your Microsoft account, as the following actions require these rights.
MS Exchange 2010 and later versions are supported.
System requirements for the server for the connector
Only in the case of a local installation of MS Exchange.
Server or virtual machine
Central Processing Unit (CPU) 4 cores or higher
RAM (RAM) 4 GB or higher
Windows 10 or Windows Server version 2012 R2 or higher
NetFramework package 4.8 or newer
Creating a service account for the connector
To use the connector, you need to create a service account. This account must have rights to read Active Directory and rights to read user mailboxes. Microsoft recommendations for delegating access to mailboxes.
There are two ways to grant permissions to read mailboxes. The simplest and most correct of them is implemented by configuring the "ApplicationImpersonation" role for the service account. Microsoft's recommendations for safe use of "ApplicationImpersonation" are available here.
The second option is not to use the "ApplicationImpersonation" role. Instead, the account must be granted the roles "Mailbox Search" and "Mailbox Search Application". And also delegate the rights to read user mailboxes and Reviewer rights to the folders of selected users. At the same time, it is important to take into account that these rights must be updated every time on newly created user folders and each user can remove them independently.
//Grant read access rights to the mailbox for all selected users
Get-Mailbox -ResultSize unlimited -Filter {(RecipientTypeDetails -eq 'UserMailbox') -and (Alias -ne 'ts')} | Add-MailboxPermission -User -AccessRights ReadPermission -InheritanceType All

//Setting read permissions for the specified user for all folders
Get-Mailbox -ResultSize unlimited -Filter {(RecipientTypeDetails -eq 'UserMailbox') -and (Alias -eq 'yva')} | foreach-object {$Mailbox = "" + $.Name; $mb = @{Expression={$Alias.Name};Label="Mailbox"}; $Folders = Get-MailboxFolderStatistics $Mailbox | % {$.folderpath} | % {$.replace(“/”,”\”)}; $Folders | foreach-object {$FolderKey = $Mailbox + ":" + $; Add-MailboxFolderPermission -identity $FolderKey -User -AccessRights Reviewer} }If the list of serviced mailboxes is unknown, the service account must have the "Mailbox Search" role.
Data source configuration
The next step is to connect the data source. To do this, go to "Administration-Manage sources-Integration API" in the workspace of your Yva.ai. Enter a name for the source (for example, Exchange) and click "Configure".
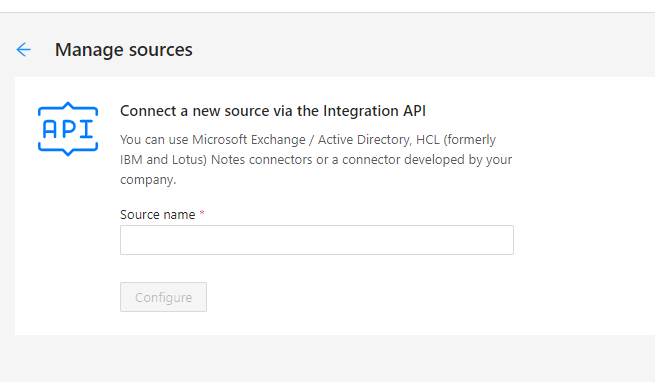
The data obtained as a result of the configuration (connection endpoints and access token) will be required to configure the connection of the connector to the platform.
Installing the connector
The connector required to transfer data to the platform must be installed in Windows OS.
The connector installation file is an msi package. You can get the current version from your manager Yva.ai.
Connector Configuration
The connector transmits data about Active Directory users to the system via LDAP and receives correspondence via the EWS protocol from Exchange for processing on the platform. The connector receives mail without attachments and cuts off citations and signatures, and also does not save the original information from emails anywhere in the platform. The connector connects to the server using the Exchange Web Services Managed API. Make sure that this feature is enabled on your server.
The connector is configured using the configuration file. The configuration file is located in the working directory of the connector and is called ConnectorService. exe. config. To configure the connector, simply open this file and change the settings. You can find out all the options available for configuration from the file README.md, which is located in the working directory of the connector.
General Settings
The frequency of the service launch (by default, 10 minutes)
<add key="SyncRepeatPeriodInMin" value="10" />Ignore the verification of the platform's SSL certificate
<add key="IgnoreTrustForSSL" value="false" />AD connection (enabled by default)
<add key="ConnectAdfs" value="true" />Connecting to Exchange (enabled by default)
<add key="ConnectExchange" value="true" />Sending results to the platform (enabled by default)
<add key="SendToYva" value="true" />
Active Directory Connection Settings
AD user login
<add key="AdfsUserLogin" value="" />AD User password
<add key = "AdfsUserPassword" value = "" />LDAP path (LDAP format:/ / dc. domain. com)
<add key = "AdfsLdapUrl" value = "" />The number of objects from AD received at a time
<add key="AdfsItemsPerPage" value="" />Template for searching for users to download from AD (AD filter syntax)
<add key="AdfsUserSearchPattern" value="" />
Exchange Connection Settings
Path to MS Exchange
<add key="ExchangeUrl" value="" />MS Exchange version (if your version is MS Exchange Exchange2013)
<add key = "ExchangeVersion" value = "" />
Supported versions of MS Exchange: Exchange2007_SP1, Exchange2010, Exchange2010_SP1, Exchange2013. Exchange2013 by default.
If you can't find your version, specify the nearest version from a list smaller than yours.
Exchange user login for working with the EWS Managed API
<add key = "ExchangeUserLogin" value = "" />Exchange User Password
<add key = "ExchangeUserPassword" value = "" />An encrypted string containing the username and password
<add key="ExchangeEncryptedCredentials" value="" />The domain of the Exchange user (for example, dc.domain.com)
<add key = "ExchangeUserDomain" value = "" />The number of messages received per request to the server. By default, 500.
<add key="ExchangeEmailsPerCall" value="500" />The number of parallel threads (can not be more than the number of processor cores)
<add key = "ExchangeMaxDegreeOfParallelism" value = "" />Selecting the user source (File, All, AdGroup, Yva, or AddressList)
<add key = "ExchangeMailBoxGrabMode" value = "" />The number of messages that we are simultaneously requesting data for. By default, 27.
<add key="ExchangeLoadQntLimit" value="27" />The depth of crowling in days. By default, 120.
<add key="ExchangeCrawlingDepthDays" value="120" />
Platform Connection Settings
The endpoint of the users ' URL (obtained as a result of the configuration)
<add key = "UsersEndpointUrl" value = "" />The endpoint of the email URL (obtained as a result of the configuration)
<add key = "MailsEndpointUrl" value = "" />The endpoint of the folder URLs (obtained as a result of the configuration)
<add key="MailFoldersEndpointUrl"" />The endpoint of the organization's URL (obtained as a result of the configuration)
<add key="OrganizationEndpointUrl" " />The endpoint of the settings URL (obtained as a result of the configuration)
<add key="SourceSettingsEndpointUrl" value="" />Authorization token (obtained as a result of configuration)
<add key = "AuthToken" value = "" />The maximum size of the request to the Yva API.
<add key="MaxRequestSizeInMb" value="100" />
Transferring data from Exchange to the Platform
Message body transmission (enabled by default)
<add key="SendMessageBody" value="true" />
This setting allows you to choose the mode of data transmission to the Platform: true-metadata and messages are transmitted - this allows you to build graphs and forecasts more accurately; false - only metadata is transmitted - this increases the overall level of security.
White and black lists
If the "ExchangeMailBoxGrabMode" option uses the "File" option, then there are two possible options for working with mailboxes - “blacklist” (blacklist.json) and "whitelist" (whitelist.json).
When working with the whitelist, a list of email addresses is specified, to which the connector will transmit correspondence or metadata for further analysis on the platform.
When working with the blacklist, a list of email addresses is specified that will be excluded by the connector from the transmission and processing process.
The paths to the list files are specified in the “ExchangeWhiteList” and “ExchangeBlackList " options.
The files are filled in as follows:
["email1@company.com", "email2@company.com", "emailN@company.com"]
Launching the connector
After making changes to the settings, save the configuration file and start the "Yva Exchange Server Connector" connector service from the services.msc snap-in.
You can check the functionality of the connector by opening the operation log located in the logs folder of the connector's working directory (logs). Logs are created daily, files are named according to the date. Please note that the temporary absence of log entries does not always mean that the connector is not working. This may indicate that the connector is processing a large user directory or is waiting for a response from the servers.
The log should not contain errors, and if the connector is configured correctly, it will contain a list of objects transferred from AD and Exchange to the platform.
The result of the connector is that users are uploaded to the platform and are available in the user management interface.
It will take about 10-15 minutes before users appear in the platform, since the connector transmits data in parts, storing them in a buffer.