Atlassian Jira Server
Make sure that you have administrator access to your Atlassian account, as the following actions require these rights.
Creating a private-public key pair
To create keys, you will need any linux machine and the openssl utility (usually included in the standard set of utilities).
Alternately, enter the following commands:
openssl genrsa -out jira_privatekey.pem 1024
openssl req -newkey rsa:1024 -x509 -key jira_privatekey.pem -out jira_publickey.cer -days 3654
openssl pkcs8 -topk8 -nocrypt -in jira_privatekey.pem -out jira_privatekey.pcks8
openssl x509 -pubkey -noout -in jira_publickey.cer > jira_publickey.pem
Save the obtained results as a text for further use.
Creating application in Jira
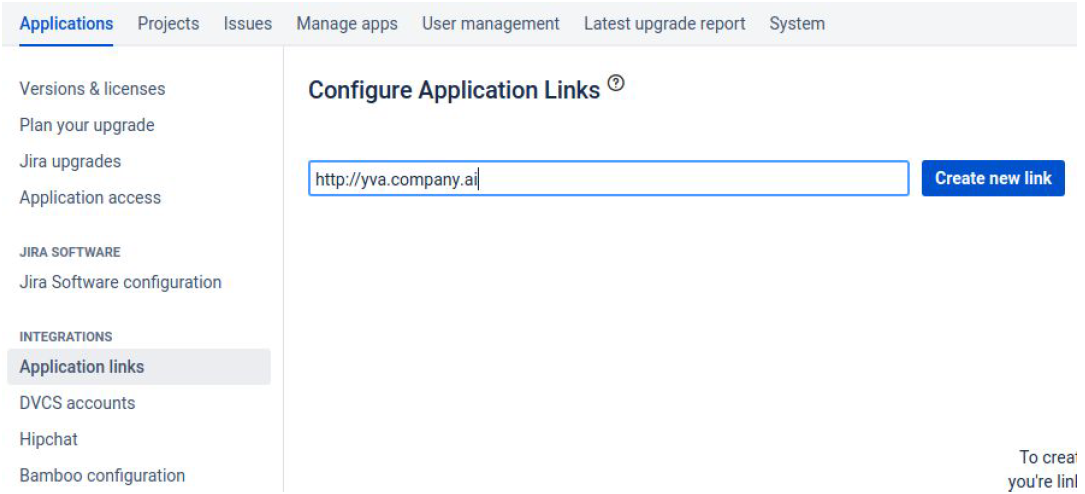
Connect applications in your Jira server settings. To do this, go to "Settings - Applications - Integration - Application Connections". As an application link you can use the address of your platform (for example, yva.platform.ai).
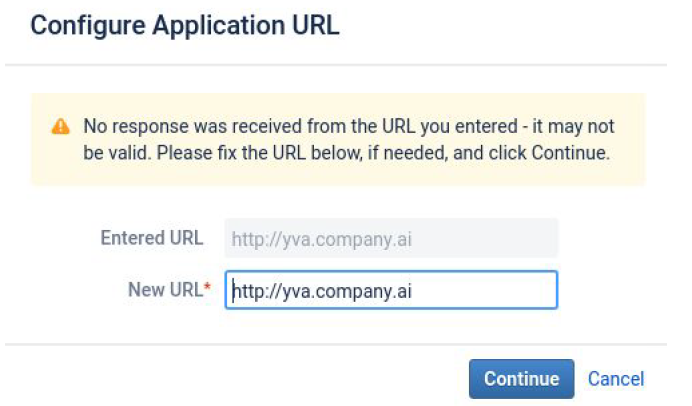
On the "Configure Application URL" screen, ignore Jira's warning that there is no connection and click "Continue".
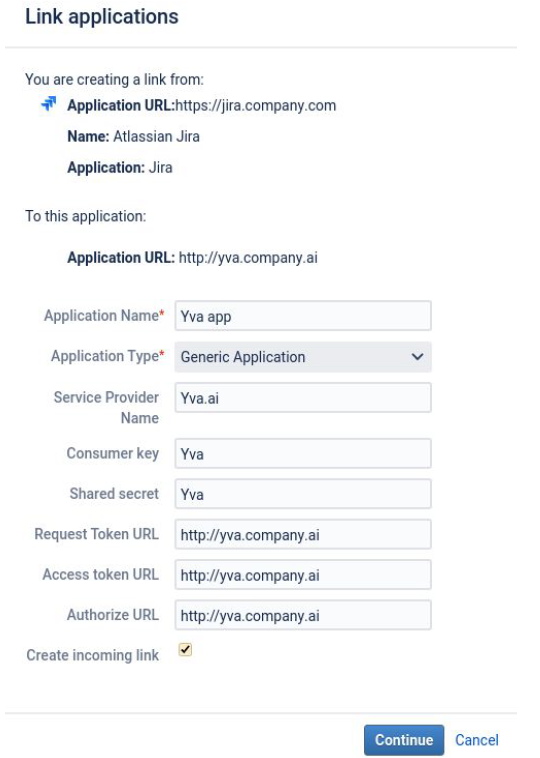
On the "Link applications" screen, fill in the fields and click on the "Continue" button.
Application name: Yva app
Application type: Generic Application
Other fields: Fill in with any values
Be sure to tick the "Create an incoming connection" check box.
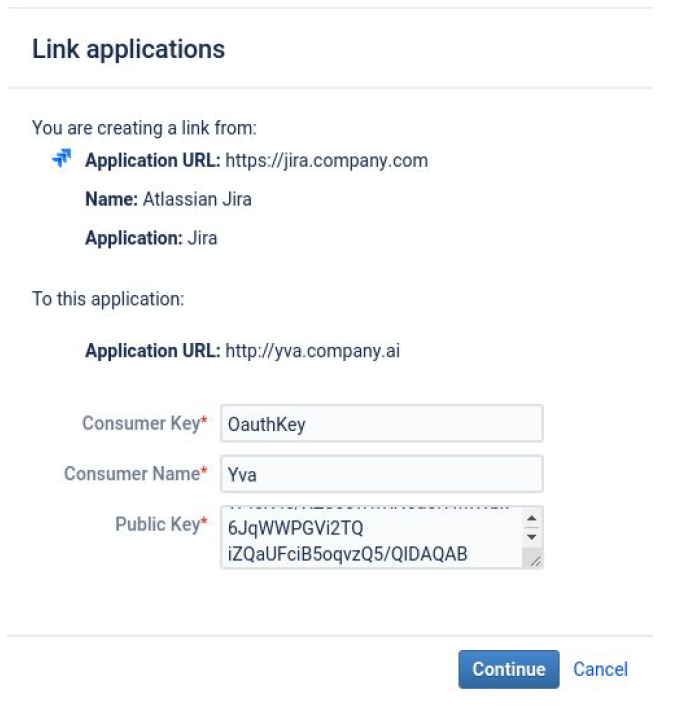
On the "Link applications" screen, fill in the fields and click on the "Continue" button.
Consumer key: OauthKey
Consumer name: Yva
Public key: the text of the key you received earlier (jira_public key.pem)
Note: to get the text of the key, just open the jira_publickey.pem file created earlier by any editor and copy the content.
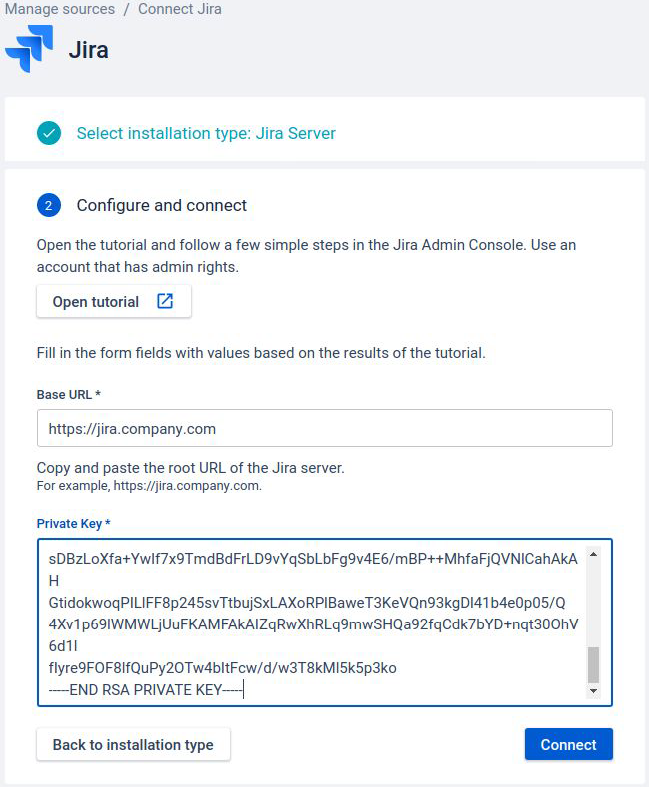
Source configuration
After connecting applications, go to the data sources configuration section on the Yva platform.

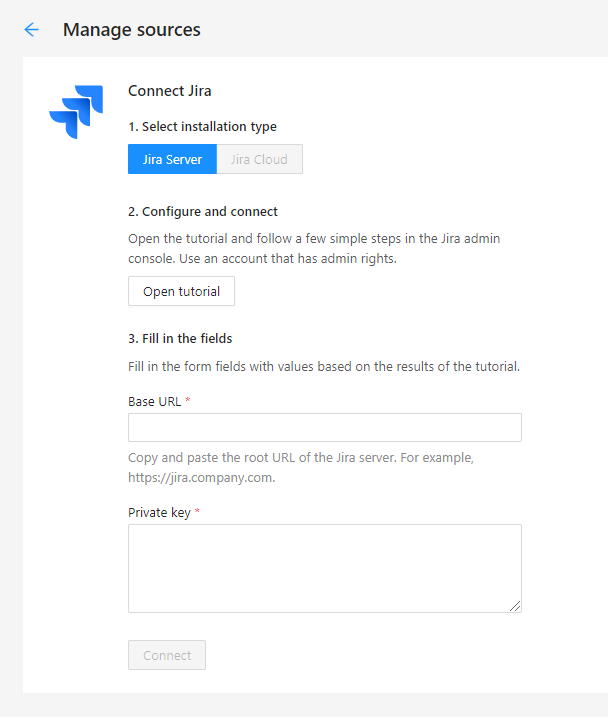
Specify the values of all fields and click on the "Connect" button:
Base URL: Jira URL (e.g. https://jira.company.com)
Private key: the key you got earlier (jira_private key.pem)
Note: to get the key, just open the jira_privatekey.pem file created earlier with any editor and copy the content.
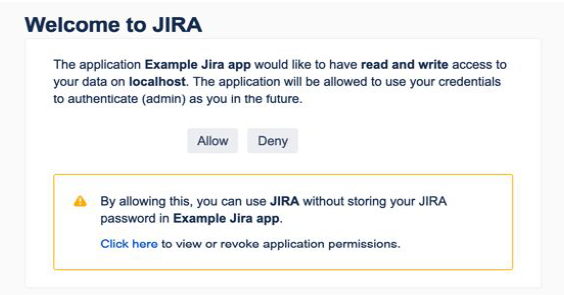
On the page of granting access to the application, click on the "Allow" button”.
Make sure that "Jira Server" appears in the source list on the right side of the page.